Embarking on a comprehensive home renovation requires a disciplined approach to planning, budgeting, and trade management. Property owners often struggle with determining where to start when updating an aging or outdated structure. A logical project sequence prevents costly rework, protects newly installed building materials, and keeps construction schedules moving forward efficiently. Every successful overhaul starts with a clear structural assessment. Homeowners must thoroughly evaluate the physical condition of the roof, foundation, exterior walls, and utility infrastructure before picking out interior paint colors or cabinet styles.
Managing multiple specialty trade crews demands precise organization, clear communication, and careful site logistics. Partnering with an experienced home renovation contractor helps establish a realistic master schedule. This industry professional coordinates sub-contractors, manages local municipal permitting processes, orders long-lead items, and ensures structural modifications strictly meet building safety codes. By establishing a central point of contact, property owners avoid the confusion and delays associated with self-managing separate trade schedules.
A successful whole-house project balances essential exterior weatherproofing with detailed interior remodeling. Skipping critical exterior protections to fast-track living room updates often leads to water damage, ruined drywall, and wasted financial capital. The ideal remodeling checklist addresses structural protection first, followed by rough utility mechanical installations, wall enclosures, and high-end surface finishes. This systematic method safeguards the financial investment while turning outdated houses into durable, energy-efficient residences.
Phase 1: Securing the Exterior Envelope and Drainage
The first physical phase of any major residential renovation focuses on securing the building envelope against water intrusion and climate exposure. Rainwater represents the single greatest threat to structural longevity. Uncontrolled roof runoff damages concrete foundations, rots exterior wood framing, and eventually leads to toxic indoor mold growth. Prioritizing proper drainage and gutter installation ensures that heavy rainfall is directed safely away from foundation walls before interior construction begins. Modern seamless aluminum systems with wide downspouts offer the high volume capacity needed to handle severe storms without overflowing.
Once roof drainage is stabilized, wall openings require immediate evaluation to stop air drafts and moisture leaks. Drafty or deteriorating window frames allow hidden moisture into wall cavities, causing unseen structural decay that ruins new drywall, insulation, and paint finishes. Investing in a professional window replacement service seals these vulnerable entry points. Modern insulated multi-pane glass units lower monthly heating and cooling costs while shielding the building interior from annoying street noise.
Securing these building envelope elements early creates a climate-controlled workspace for interior trade workers. Electricians, drywall installers, and trim carpenters work faster and achieve better craftsmanship when indoor temperature and humidity levels remain stable. Addressing exterior vulnerabilities upfront ensures that future investments in interior drywall, custom cabinetry, and hardwood trim stay dry and secure for decades to come.
Phase 2: Reinforcing Entryways and Outdoor Site Access
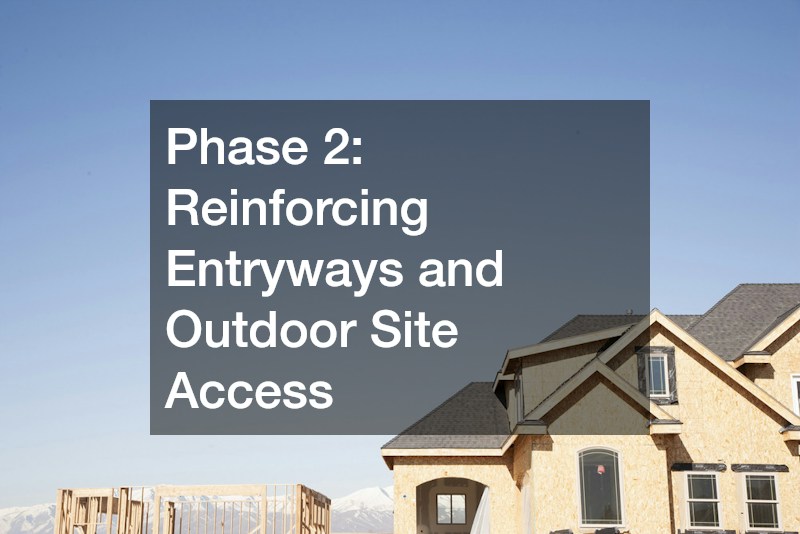
After fortifying the main structural shell, construction attention turns to large garage entry points and ground-level site stability. Large structural openings like garage bays are frequent sources of substantial energy loss and thermal draft bridging. An outdated, uninsulated garage door allows cold winter air and summer heat to infiltrate adjacent living rooms or master bedrooms located directly above the garage space. Scheduling a modern garage door installation eliminates draft issues, improves overall home security, and instantly elevates curb appeal. Insulated steel or composite models provide superior thermal efficiency and whisper-quiet mechanical operation.
Simultaneously, exterior ground conditions around the home require careful grading, water channel management, and physical stabilization. Construction crews and heavy delivery equipment can disrupt soil drainage around the foundation during early structural project phases. Installing durable stone pathways, retaining walls, and custom stone patios through professional hardscaping services helps channel surface water away from living structures. Well-planned stonework also prevents topsoil erosion and creates clean, attractive transitions between outdoor driveways and primary home entrances.
Proper site preparation at this stage prevents mud, gravel, and debris from being tracked into the home during subsequent internal construction phases. Staging outdoor surfaces early gives delivery trucks and trade workers a clean, stable area to unload framing lumber, drywall sheets, and delicate interior finishes. Establishing clear entry pathways keeps the job site orderly and minimizes physical damage to surrounding lawn areas.
Phase 3: Structural Framing and Lower-Level Expansion
With the exterior building envelope completely sealed against weather elements, construction shifts inward to interior framing and space expansion. Lower levels represent some of the most versatile square footage in a residential property. However, converting dark storage spaces into functional living areas requires careful structural planning and moisture mitigation. Completing a full basement finishing project adds valuable bedrooms, home offices, or entertainment media rooms to the existing home footprint. This process involves installing subfloor moisture barriers, framing perimeter walls, and running specialized wiring and plumbing lines.
Executing major structural layout adjustments upstairs or downstairs demands expert oversight and engineering calculations. A skilled home renovation contractor evaluates load-bearing walls, calculates proper support beam sizes, and organizes required structural inspections with local building officials. Modifying interior layouts often requires removing outdated non-load-bearing partition walls to create modern open-concept living spaces that improve natural light distribution.
Rough utility installations occur alongside structural framing tasks. Electricians run dedicated electrical circuits for high-demand modern appliances, while plumbers position water supply lines and drain pipes inside open stud wall bays. Mechanical contractors install supply and return air ducts to ensure balanced airflow throughout newly framed living areas. Completing these rough-in steps before closing walls ensures that all electrical, plumbing, and HVAC components pass rigorous municipal building inspections.
Phase 4: Kitchen Design and Primary Surface Selection

Once mechanical rough-ins pass official municipal inspections, drywall installation begins, bringing defined shape to individual rooms. The primary focal point of most residential transformations is the main living and culinary area. Planning a thorough kitchen remodeling project involves balancing efficient storage options, practical workflow design, and high-end aesthetic finishes. Ergonomic layout designs must account for the classic work triangle between the refrigerator, sink, and cooktop to ensure comfortable everyday meal preparation.
Material selection plays a critical role in long-term kitchen durability and everyday resale value. Heavy-use prep surfaces require high-density materials that comfortably withstand heat, moisture, and daily knife wear. Precision countertop installation transforms raw base cabinetry into functional prep stations. Quartz, granite, and dense natural stone remain popular choices due to their strong resistance to staining, scratching, and heat damage. Proper digital templates and expert fitment ensure seamless joints around undermount sinks and cooktops.
Proper coordination between cabinetmakers and stone fabricators prevents costly measuring errors and installation delays. Base cabinets must be perfectly level and anchored securely to wall studs before heavy stone slabs are set in place. Plumbing fixtures, sinks, and cooktops must be physically on-site so stone installers can cut exact plumbing penetrations. Taking time to align these elements correctly ensures a clean finish and reliable long-term performance.
Phase 5: Unifying Floors and Main Living Spaces
Following cabinet and surface installations, construction focus shifts to floor coverings throughout the main level and upper floors. Floor surfaces endure constant foot traffic and link separate rooms into a single cohesive visual space. Hiring specialized flooring contractors guarantees that underlying subfloors are properly leveled, cleaned, and structurally reinforced before finish materials are laid down. Whether laying solid hardwood, luxury vinyl plank, or oversized porcelain tile, proper subfloor preparation prevents annoying floor squeaks, telegraphing seams, and premature surface wear.
Choosing consistent flooring materials across open floor plans enhances overall visual flow and makes interior rooms feel significantly larger. During comprehensive interior remodeling, replacing mismatched flooring across hallways, dining rooms, and family rooms creates a polished, high-end appearance. Smooth floor transitions between rooms eliminate tripping hazards and establish unified design themes throughout the entire residence.
Protecting newly installed floors during the remaining finish construction phase is vital. Workers must lay heavy protective paper or temporary floor boards over finished floor surfaces to prevent scratches, paint spills, and tool impacts. Proper timing of floor installation – after messy drywall sanding and wall painting, but before final baseboard trim installation – ensures that wood trim fits tightly against fresh floor surfaces without ugly gaps.
Phase 6: Aligning Outdoor Living Areas with Thermal Efficiency

As interior rooms reach final completion, trade touches connect internal living comfort with exterior features. Modern residential design emphasizes smooth transitions between indoor family rooms and outdoor patio areas. Expanding outdoor entertainment spaces through hardscaping services creates functional outdoor kitchens, stone fire pits, and comfortable seating areas. Using matching masonry tones and durable stone pavers ties outdoor structures directly to the architectural style of the main residence.
Maintaining high energy efficiency along these indoor-outdoor transition points requires modern window and door systems. Completing a targeted window replacement service on patio-facing walls allows natural light to flood interior rooms while maintaining superior thermal insulation. Modern double-pane and triple-pane glass options featuring low-emissivity coatings reduce UV sun damage to interior furniture, flooring, and artwork.
Integrating interior design themes with exterior outdoor living zones produces a unified living environment. Homeowners enjoy expanded functional space for entertaining guests during pleasant weather seasons. Strategic exterior landscape lighting, stone pathways, and energy-efficient glass panels turn backyards into natural extensions of indoor living spaces, enhancing both daily enjoyment and long-term property value.
Phase 7: Customizing Culinary Features and Specialized Finishes
With primary structural work complete, secondary trade detailing refines kitchen and living spaces to high standards. Advanced kitchen remodeling steps include installing decorative tile backsplashes, under-cabinet LED task lighting, and custom cabinet hardware. These detailed touches personalize cooking zones while improving functional illumination over food preparation counters.
Custom stone edging and specialized protective sealants complete the overall countertop installation process. Applying high-grade sealers to natural stone surfaces protects delicate marble or granite against acidic liquid stains and cooking oil spills. Precise flexible caulk lines along wall intersections prevent water from leaking behind cabinets and damaging structural framing.
Attention to detail during this finishing phase distinguishes standard updates from true custom craftsmanship. Custom soft-close cabinet hardware, pop-up electrical outlets in kitchen islands, and dedicated pantry organizers elevate daily convenience. Completing these refined tasks turns busy cooking zones into practical, elegant spaces built for long-term daily family life.
Phase 8: Finishing Lower Levels and Surface Detailing
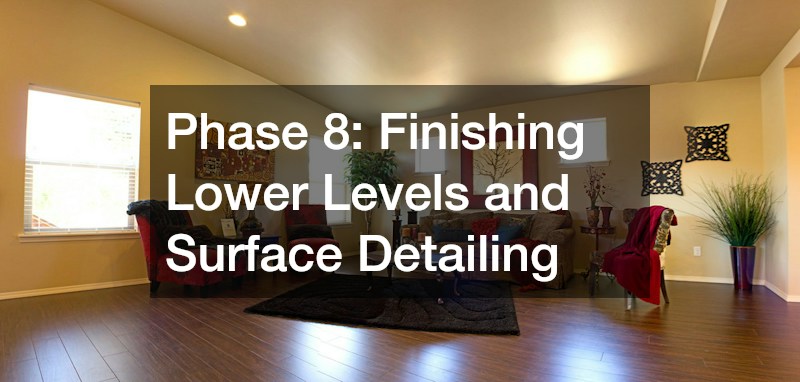
Finalizing lower-level living zones requires specific flooring choices tailored to below-grade environmental conditions. Lower concrete floor slabs can transfer ground moisture into living spaces if not properly insulated. Completing a successful basement finishing project depends on choosing moisture-resistant subfloor panels and engineered flooring materials. Waterproof luxury vinyl plank and glazed ceramic tile perform exceptionally well in basement environments, offering attractive finishes that resist moisture damage.
Experienced flooring contractors understand how to test concrete slabs for hidden moisture vapor emission before installing finish products. Using appropriate moisture vapor barriers and specialized waterproof adhesives prevents floor lifting, cupping, or adhesive breakdown over time. Proper floor preparation ensures that lower-level living spaces remain dry, comfortable, and odorless for many years.
Adding finished baseboards, door casings, and fresh interior paint completes lower-level transformations. Recessed ceiling lights, warm neutral wall colors, and strategic mirror placement brighten spaces that lack abundant natural window light. These detailed finishing steps turn lower levels into inviting spaces that match the overall quality of upper living floors.
Phase 9: Final Inspections and Long-Term Maintenance
The final stage of a whole-home transformation involves thorough quality inspections, punch-list walk-throughs, and establishing routine seasonal maintenance plans. Homeowners should regularly inspect exterior drainage systems to ensure proper water dispersal. Routine maintenance for a new gutter installation includes clearing autumn leaves, flushing debris, and inspecting downspout extensions to keep heavy rainwater flowing safely away from foundation walls.
Exterior entry points also require periodic mechanical inspection to preserve optimal operating performance. Inspecting tracks, lift cables, springs, and auto-reverse safety sensors following a garage door installation keeps overhead doors operating smoothly and safely. Regular lubrication of moving metal parts prevents premature wear and maintains quiet operation through changing weather seasons.
Establishing a seasonal upkeep schedule protects the significant financial capital invested in a comprehensive home overhaul. Periodic checks of window seals, exterior paint, stone mortar joints, and flooring finishes prevent minor maintenance issues from turning into expensive repairs. Following a structured maintenance checklist ensures that whole-home renovations maintain their beauty, structural integrity, and market value for decades.