- Sagging doors are often caused by loose or worn hinges, heavy doors, humidity changes, or poor initial installation. Understanding the cause helps you fix the problem effectively.
- Tightening hinge screws is the simplest first step—sometimes longer screws are needed for better stability.
- Shims can lift and realign the door if tightening screws alone doesn’t fully correct sagging.
- Incremental adjustments work best—small changes to hinge position prevent misalignment or stripped screws.
- Replacing worn or damaged hinges may be necessary when adjustments and shims aren’t enough.
- Preventative maintenance extends door life: regularly tighten screws, lubricate hinges, monitor humidity, and avoid slamming doors.
- Most sagging doors can be fixed DIY, but severely warped doors, damaged frames, or heavy exterior doors may require a professional.
A sagging door can be more than just an eyesore—it can affect your home’s security, insulation, and overall functionality. If you’ve noticed your door scraping the floor, not latching properly, or just hanging unevenly, it’s time to learn how to adjust door hinges to fix a sagging door. The good news? With the right tools and a little patience, most doors can be realigned without calling a professional.
Why Do Doors Sag in the First Place?
Before diving into the fix, it’s important to understand why doors sag. Knowing the root cause will help you prevent the problem from recurring and is the first step in learning how to fix a sagging door.
- Loose hinges: Over time, screws can loosen due to constant use or wood shrinking.
- Worn hinges: Metal hinges can bend or warp, especially in older homes.
- Humidity and temperature changes: Wood expands and contracts, causing doors to shift.
- Heavy doors: Solid wood doors put more stress on hinges, making them more likely to sag.
- Incorrect installation: If a door wasn’t hung properly initially, sagging is almost inevitable.
Understanding the reason helps you decide whether adjusting the hinges is enough or if you need a replacement.
What Tools Will You Need to Adjust Door Hinges?
Gathering the right tools upfront makes the process smoother. Here’s what you’ll need:
- Screwdriver (flathead or Phillips, depending on your hinge screws)
- Wood shims or cardboard
- Replacement screws (longer ones are better for extra grip)
- Hammer or mallet (optional)
- Drill (optional, for pilot holes)
- Level (to check alignment)
Having these on hand will save frustration and keep your work efficient.
How Can You Tell If a Door Hinge Needs Adjusting?
Not every door that sticks is suffering from sagging hinges. Here are the signs that indicate it’s hinge-related:
- Door sticks or scrapes at the top, bottom, or side
- Gaps are uneven between the door and frame
- Door doesn’t latch without slamming
- Visible tilt when the door is closed
If you notice one or more of these signs, adjusting the hinges is likely your solution.
Step-by-Step Guide: How to Adjust Door Hinges
Now that you’re equipped with tools and knowledge, let’s go through the steps.
Step 1: Identify Which Hinge Is Causing the Sag
Most sagging doors are affected by the top hinge, though middle and bottom hinges can also contribute. Close the door and observe:
- Is the door leaning toward the latch side? The top hinge is likely loose.
- Is the bottom dragging on the floor? Check the bottom hinge alignment.
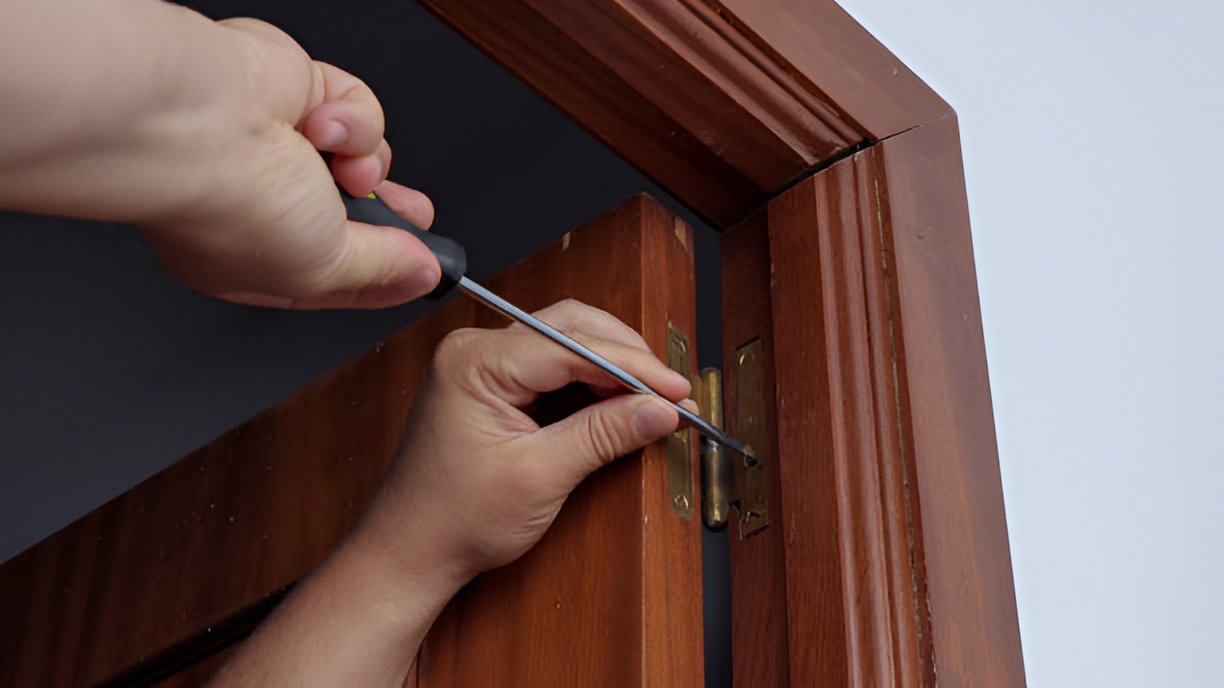
Step 2: Tighten the Screws
Often, a loose screw is all it takes to fix a sagging door.
- Open the door fully.
- Use a screwdriver to tighten all hinge screws, starting with the top hinge.
- If screws are stripped, consider replacing them with longer screws for better grip.
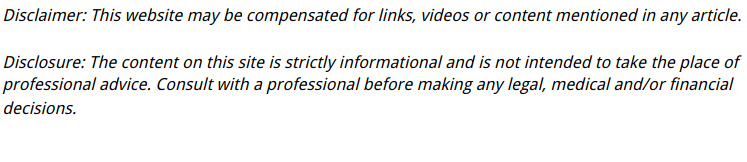
Step 3: Shim the Hinge if Needed
If tightening doesn’t fully fix the problem, a shim can lift the door slightly.
- Remove the screws from the hinge that needs adjustment.
- Place a thin piece of cardboard or wood shim behind the hinge.
- Reattach the hinge and tighten the screws.
- Check the door’s alignment and latch operation.
Shims are especially useful for older doors where the frame may have shifted slightly.
Step 4: Adjust the Screws Incrementally
Sometimes, sagging requires small adjustments rather than a complete fix at once.
- Loosen the hinge screws slightly.
- Shift the hinge up or down as needed.
- Retighten and test the door.
- Repeat until the door aligns perfectly.
Step 5: Check the Door Alignment
After adjustments, make sure your door swings smoothly:
- Use a level to check vertical alignment.
- Ensure the door latches properly without force.
- Open and close the door multiple times to verify the fix.
Step 6: Replace Worn Hinges if Necessary
If tightening and shimming don’t solve the problem, the hinge itself might be worn:
- Remove the old hinge.
- Take it to a hardware store to find a matching replacement.
- Install the new hinge and check the alignment.
Replacing hinges is a simple solution that can prevent further sagging.
Tips for Preventing Door Sag in the Future
Once your door is back in alignment, take a few preventative steps:
- Regularly tighten screws: Make it a habit to check hinge screws every few months.
- Use longer screws: Particularly in top hinges, longer screws help anchor the door better.
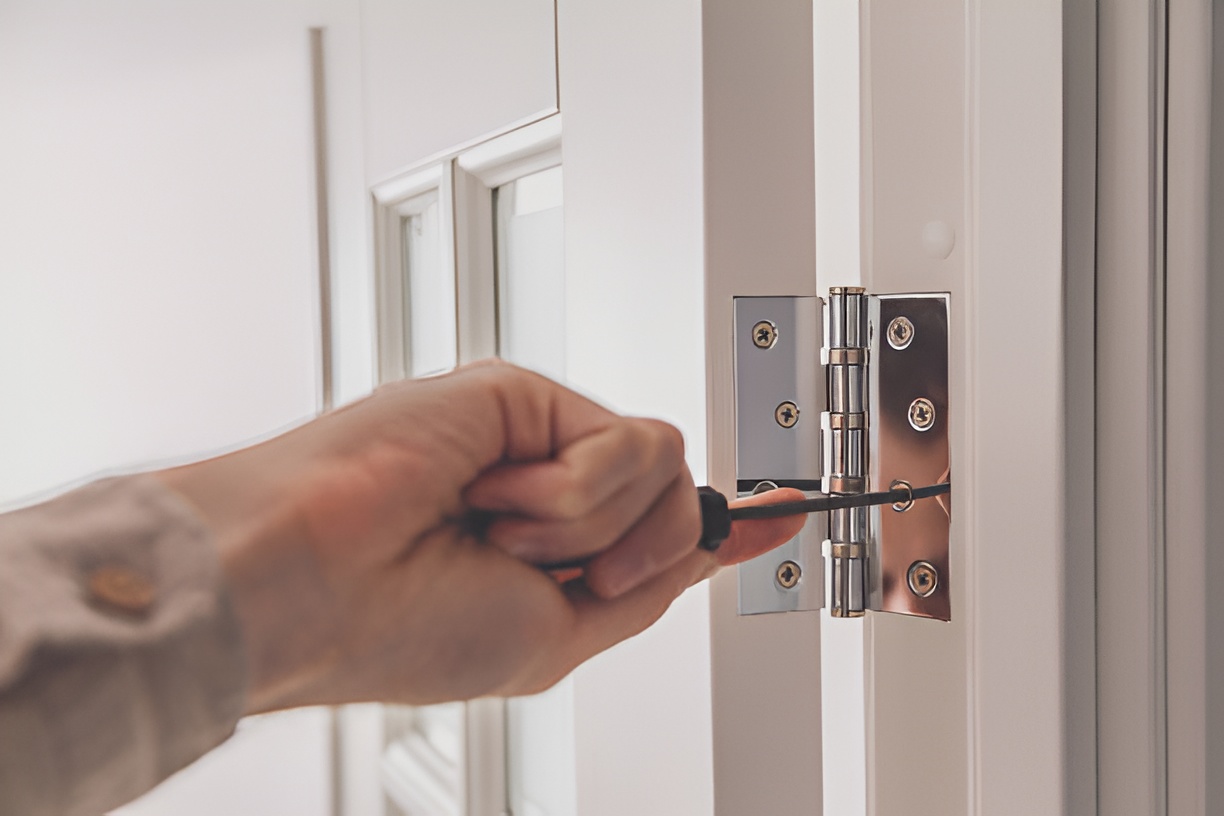
- Lubricate hinges: A bit of WD-40 or silicone spray keeps hinges operating smoothly.
- Monitor humidity: Wood doors react to moisture; using a dehumidifier can help prevent warping.
- Avoid slamming doors: Rough handling can loosen screws and warp hinges over time.
Can You Fix a Sagging Door Without Removing the Door?
Yes! Many minor adjustments can be done while the door is still in the frame:
- Tighten hinge screws while the door is closed.
- Use shims behind the hinge without removing the door entirely.
- Slightly adjust hinge positions by loosening screws and nudging the door.
However, if the sag is severe, removing the door might make adjustments easier and more precise.
How Long Does It Take to Adjust Door Hinges?
For most doors, minor adjustments can take 10–30 minutes per door. If you need to replace hinges or use shims extensively, it could take an hour or more. The key is patience—rushing the process can lead to misalignment or stripped screws.
Common Mistakes to Avoid When Adjusting Door Hinges
Even experienced DIYers can make mistakes. Avoid these pitfalls:
- Using screws that are too short—this won’t secure the hinge properly.
- Over-tightening screws—this can strip the screw holes.
- Ignoring the door frame—sometimes the frame is warped, requiring extra attention.
- Adjusting too much at once—small incremental adjustments are safer and more effective.
- Skipping the alignment check—always test the door after every adjustment.
When Should You Call a Professional?
While most sagging doors are easy to fix yourself, some situations may require a pro:
- Doors that are severely warped or cracked.
- Frames that are damaged or rotting.
- Repeated sagging despite adjustments.
- Heavy exterior doors that are difficult to maneuver safely.
A professional carpenter or handyman can address structural issues and prevent future problems.
Bonus Tips: Extra Ways to Improve Door Function
Once your door is aligned, you can take a few extra steps to enhance its performance:
- Install a door stop: Prevents the door from swinging too far and loosening hinges.
- Weatherstripping: Keeps drafts out and protects your door edges.
- Check for paint buildup: Thick layers of paint can cause sticking; sanding lightly may help.
- Lubricate locks and latches: Ensures smooth operation along with hinge adjustments.
In Closing
Fixing a sagging door doesn’t have to be a headache. By following these steps on how to adjust door hinges to fix a sagging door, you can restore your door’s alignment, improve security, and make daily use hassle-free. The key is identifying the root cause, using the right tools, and taking small, careful steps during the adjustment process. With regular maintenance and attention to your hinges, you can keep your doors functioning smoothly for years to come.